
LAMP stands for Linux, Apache, MySQL, and PHP. It is a stack of open-source software. The first layer of the LAMP stack is the well-known Linux Operating System, which offers numerous configuration options and strict security. The LAMP stack is straightforward, reliable, and powerful. The second tier in the stack, Apache, provides support for compiled modules for popular programming languages like PHP, Perl, Python, Node.js, etc. Through the internet, this HTTP web server distributes web content. When deploying a LAMP stack, you have two options for the database layer. As a Relational Database Management System (RDMS) for your online applications, you can choose between MySQL and MariaDB. PHP is the last package on the list. To construct static or dynamic websites, you may simply embed this programming language in HTML documents.
LAMP is commonly used to build dynamic web applications. Here’s a brief overview of each component:
Linux: This is the operating system that runs the LAMP stack. It provides a stable, secure, and scalable platform for running web applications.
Apache: This is the web server software that serves web pages to users over the internet. It listens for incoming HTTP requests and sends back the appropriate response.
MySQL: This is a relational database management system that stores and retrieves data for web applications. It allows you to store structured data, such as user information, product catalogs, and more.
PHP: This is a programming language that is used to build dynamic web applications. It can be used to generate HTML, process form data, and interact with databases like MySQL.
Together, these four components form the LAMP stack, which is a popular choice for building web applications due to its flexibility, ease of use, and low cost.
1. How to Install Apache Webserver
-
SSH into your Ubuntu server as a non-root user, then upgrade your packages and the package information index.
$ sudo apt update && sudo apt -y upgrade
To install the Apache Web server, run the command listed below.
$ sudo apt install -y apache2
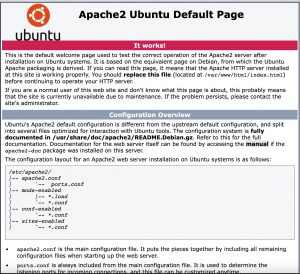
Enter the public IP address of your server or domain name in place of (192.0.2.1) when accessing the URL below in a web browser.
You should see the standard Apache web page as displayed below.
2.How to Install a Database Server
When deploying a LAMP stack, you can choose between installing MySQL or MariaDB server.
Run the command below to set up the MySQL server.
$ sudo apt install -y mysql-server
Execute the command listed below to configure a MariaDB server.
$ sudo apt install -y mariadb-server mariadb-client
Run the command listed below to secure your database, whichever one you’ve selected.
$ sudo mysql_secure_installation
Enter the below choices and press (ENTER) in each prompt to proceed.
MySQL Server
(
Would you like to setup VALIDATE PASSWORD component?
Press y|Y for Yes, any other key for No: n
Please set the password for root here.
New password: EXAMPLE_PASSWORD
Re-enter new password: EXAMPLE_PASSWORD
Remove anonymous users? (Press y|Y for Yes, any other key for No) : y
Disallow root login remotely? (Press y|Y for Yes, any other key for No) : y
Remove test database and access to it? (Press y|Y for Yes, any other key for No): y
Reload privilege tables now? (Press y|Y for Yes, any other key for No) : y
)
MariaDB Server
(
Enter current password for root (enter for none): ENTER
Set root password? [Y/n]: Y
New password: EXAMPLE_PASSWORD
Re-enter new password: EXAMPLE_PASSWORD
Remove anonymous users? [Y/n] Y
Disallow root login remotely? [Y/n] Y
Remove test database and access to it? [Y/n] Y
Reload privilege tables now? [Y/n] Y
)
Once you’ve secure the installation, login to the RDMS as root:
$ sudo mysql -u root -p
Enter your database server root password and press (ENTER) to proceed. Then, type the command below to create your first (test_database) database.
MySQL server.
mysql> CREATE database test_database;
MariaDB server.
MariaDB [(none)]> CREATE database test_database;
Output.
Query OK, 1 row affected (0.00 sec)
Next step, list the databases in the server by running the (SHOW DATABASES) command.
MySQL server.
mysql> SHOW DATABASES;
MariaDB server.
MariaDB [(none)]> SHOW DATABASES;
Your (test_database) should be in the list below.
+——————–+
| Database |
+——————–+
| information_schema |
| mysql |
| performance_schema |
| sys |
| test_database |
+——————–+
5 rows in set (0.01 sec)
Create a (test_user), and provide it full access to the newly formed database. When testing database connectivity with PHP, you’ll need this user’s information. Substitute a powerful value for (EXAMPLE_PASSWORD).
MySQL server.
mysql> CREATE USER ‘test_user’@’localhost’ IDENTIFIED WITH mysql_native_password BY ‘EXAMPLE_PASSWORD’;
GRANT ALL PRIVILEGES ON test_database.* TO ‘test_user’@’localhost’;
FLUSH PRIVILEGES;
EXIT;
MariaDB server.
MariaDB [(none)]> CREATE USER ‘test_user’@’localhost’ IDENTIFIED BY ‘EXAMPLE_PASSWORD’;
GRANT ALL PRIVILEGES ON test_database.* TO ‘test_user’@’localhost’;
FLUSH PRIVILEGES;
EXIT;
Your database server is prepared. You can now install a scripting language.
3.How to Install PHP
First Step, you’ll install the PHP package. Run the command below.
$ sudo apt install -y php
Second Step, Since most web applications rely on some PHP extensions, install the most common ones using the command below.
$ sudo apt install -y php-{common,mysql,xml,xmlrpc,curl,gd,imagick,cli,dev,imap,mbstring,opcache,soap,zip,intl}
Restart the Apache webserver then to load PHP.
$ sudo systemctl restart apache2
To test PHP, create an (info.php) file in the root directory of your web server.
After you will enter the information below into the file.
<?php
phpinfo();
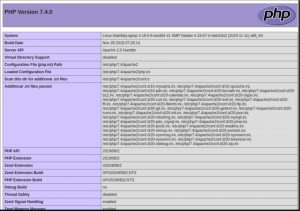
Save and close the file by pressing (CTRL + X, then Y and ENTER). Then, in a web browser, visit the URL below and replace (127.0.0.1) with your server’s correct public IP address.
You should get a detailed PHP page as shown below.
Next step, test PHP connectivity with the database that you created earlier. Open a new file for editing using nano.
$ sudo nano /var/www/html/database_test.php
After, enter the information below into the file.
<?php
$conn = new mysqli(‘localhost’, ‘test_user’, ‘EXAMPLE_PASSWORD’, ‘test_database’);
if ($conn->connect_error) {
die(“Database connection failed: ” . $conn->connect_error);
}
echo “Database connection was successful”;
Save and close the file. Then, visit the address below in a web browser and replace (192.0.2.1) with your server’s correct public IP address.
http://192.0.2.1/database_test.php
You should get the output below that shows that the script has successfully connected to the database.
echo “Database connection was successful”;